
How to Flush a Toilet Without a Handle: Your Ultimate Guide to Quick Fixes & Solutions
Is your toilet handle stuck, broken, or simply not working? Dealing with a toilet that won’t flush can be frustrating, especially when you need a quick solution. Fortunately, many common toilet issues, including a non-functional handle, can be temporarily resolved with a few simple DIY methods before you call a professional plumber.
This comprehensive guide will walk you through easy steps to flush your toilet without a handle, help you understand why your handle might be failing, and advise you on when it’s time to seek expert help from 907 Heating & Plumbing.
Why Won’t My Toilet Handle Work? Understanding Common Causes
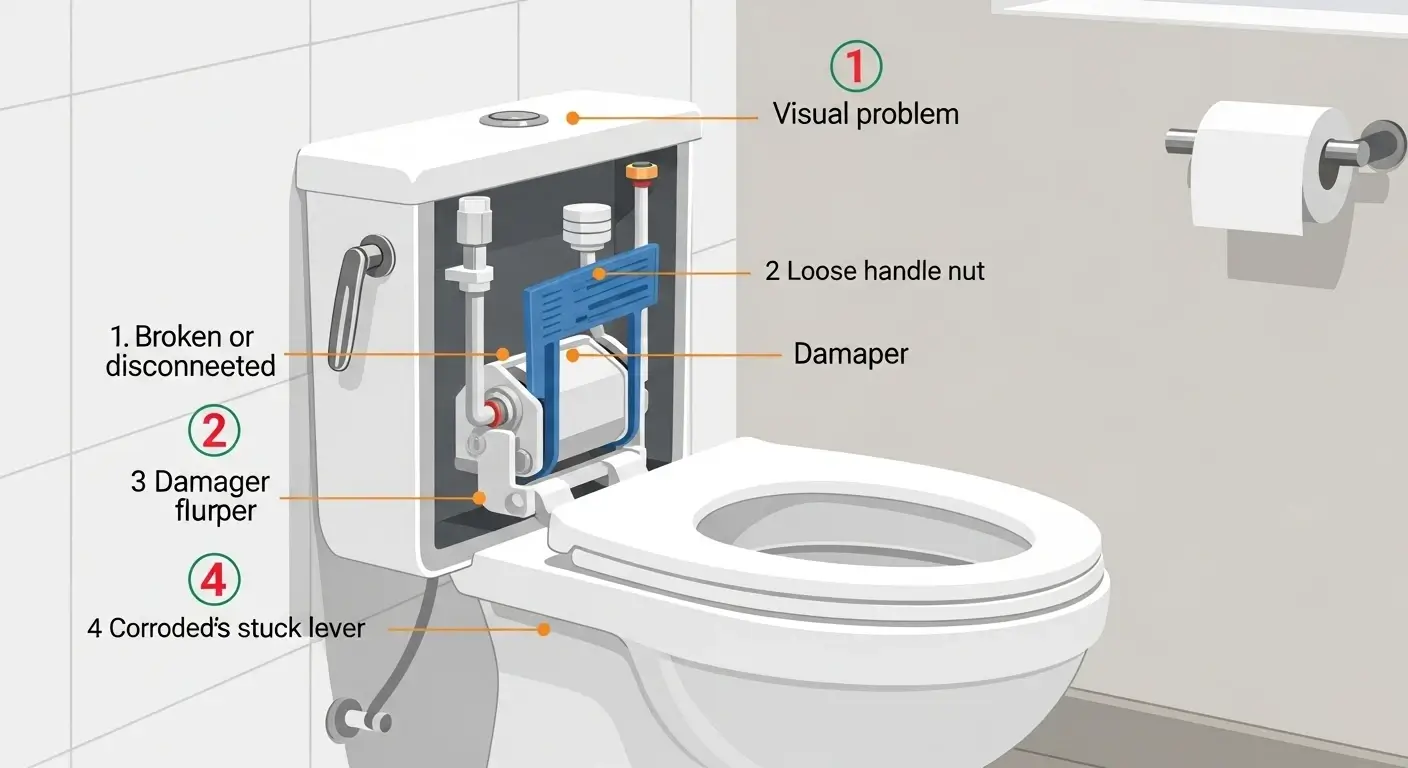
A broken or malfunctioning toilet handle is a frequent plumbing problem. Understanding the underlying cause can help you troubleshoot and potentially prevent future issues. Here are the most common reasons:
Common Toilet Handle Issues:
- Corroded or Broken Lift Chain (or Flush Chain): This is the most common culprit. The small chain connecting your toilet handle’s lever arm to the flapper (flush valve) can corrode, break, or become disconnected. If the chain isn’t pulling the flapper, water won’t be released from the tank.
- Disconnected Flush Lever (Trip Lever): The lever arm, which extends from the handle inside the tank, might have become detached from the lift chain.
- Worn-Out or Damaged Flapper (Flush Valve): The rubber flapper at the bottom of the tank is crucial for sealing the water and releasing it during a flush. If it’s worn, cracked, or doesn’t seat properly, it can prevent a full flush or cause constant running.
- Mineral Buildup in the Mechanism: Hard water can lead to mineral deposits (limescale) accumulating on the moving parts of the flush mechanism, causing them to stick or preventing smooth operation. This can affect the flush lever’s pivot point or the flapper’s seal.
- Low Water Level in the Tank: If the water level in your toilet tank is too low, there might not be enough volume or pressure to trigger a complete flush, even if the handle and chain are working. This is often linked to a faulty fill valve.
Before you consider a professional plumber, try these quick and effective manual flushing methods.
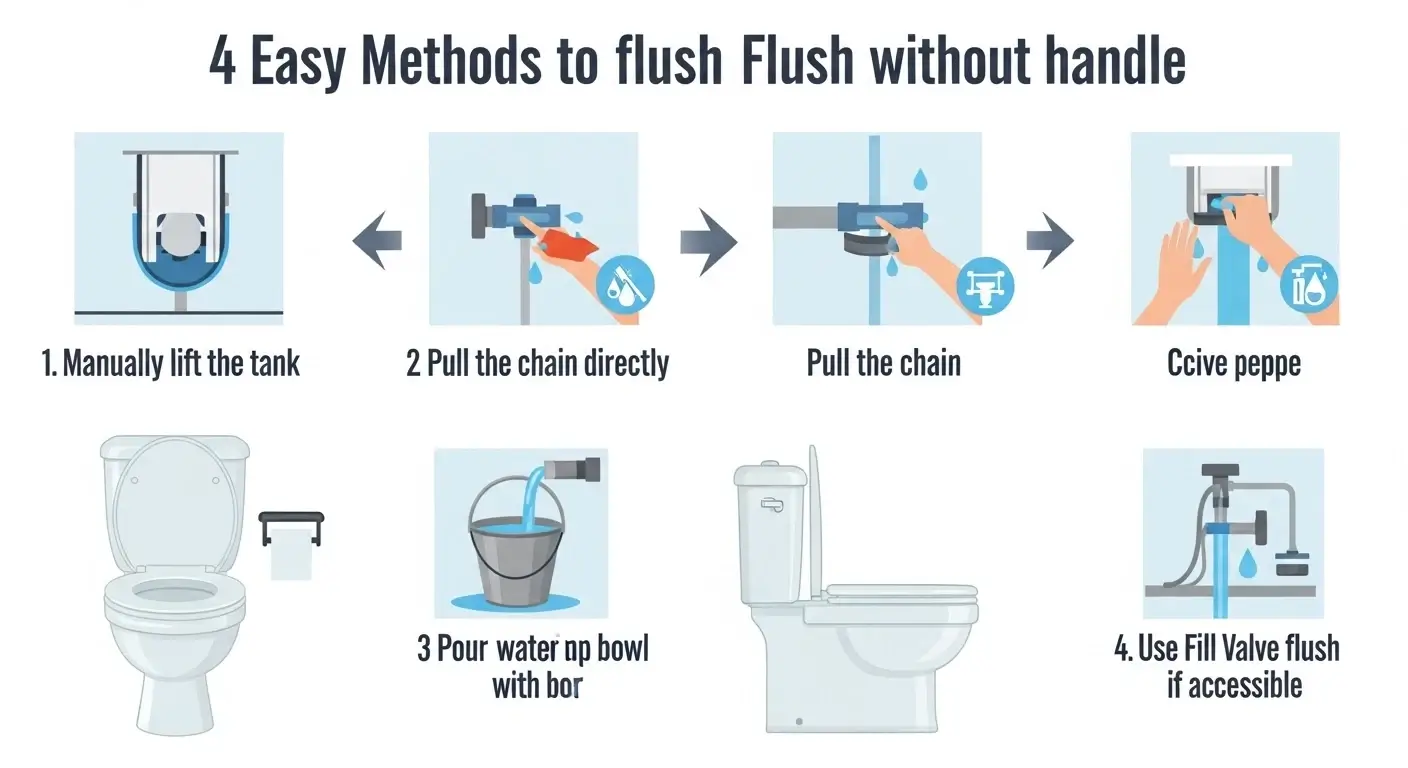
How to Flush a Toilet Without a Handle – 4 Easy Methods
Here are the practical steps to manually flush your toilet when the handle fails:
Method 1: Manually Pull the Toilet Tank’s Lift Chain (or Flush Chain)
This is the most direct way to bypass a broken handle.
- Carefully Remove the Tank Lid: Lift the ceramic lid off the toilet tank and place it safely aside on a flat, stable surface to prevent breakage.
- Locate the Lift Chain and Flapper: Look inside the tank. You’ll see the flush lever (the arm extending from where the handle used to be), the lift chain dangling from it, and the flapper (a rubber or plastic disc) at the bottom of the tank, covering the drain hole. The chain connects the flush lever to the flapper.
- Pull the Chain Upward: Gently reach into the tank (the water is clean) and grasp the lift chain. Pull it straight upward until the flapper lifts from its seat, allowing water to rush from the tank into the toilet bowl.
- Allow Water to Flow and Reseal: Hold the chain up until most of the water has drained from the tank into the bowl, initiating a complete flush. Then, release the chain to allow the flapper to fall back into place and reseal the drain hole. The tank should begin to refill.
Pro Tip: If the chain is broken or too short to reach, you might need to replace it or use the next method. Ensure the chain has a slight amount of slack (about 1/2 to 1 inch) once reconnected to prevent leaks.
Method 2: Pour a Bucket of Water Directly into the Bowl
This method is effective when there’s no water in the tank, a complete flush is needed, or if the internal tank mechanisms are completely non-functional.
- Fill a Large Bucket with Water: Use 1 to 2 gallons of water. For older, larger capacity toilets, you might need up to 3-5 gallons.
- Pour Quickly and Forcefully: Position the bucket over the toilet bowl. Rapidly pour the entire contents of the bucket into the toilet bowl from waist height. The sheer volume and force of the water will simulate a powerful flush, pushing waste down the drain.
- Repeat if Necessary: If the first pour doesn’t clear the bowl, repeat the process until the toilet is flushed.
Tip: Using warm water can sometimes aid in dissolving minor clogs, though this method is primarily about water volume and force. This method is also useful during water outages.
Method 3: Utilize the Emergency Flush Valve (Specific Toilet Types)
Some commercial or high-efficiency residential toilets, particularly those with pressure-assisted systems or specific low-profile designs, might have a designated manual flush button or valve located directly inside the tank or on the flush mechanism itself.
- Locate and Press: Remove the tank lid and look for a small button or lever on the main flush mechanism. Press it firmly to release water. Consult your toilet’s manual if you’re unsure.
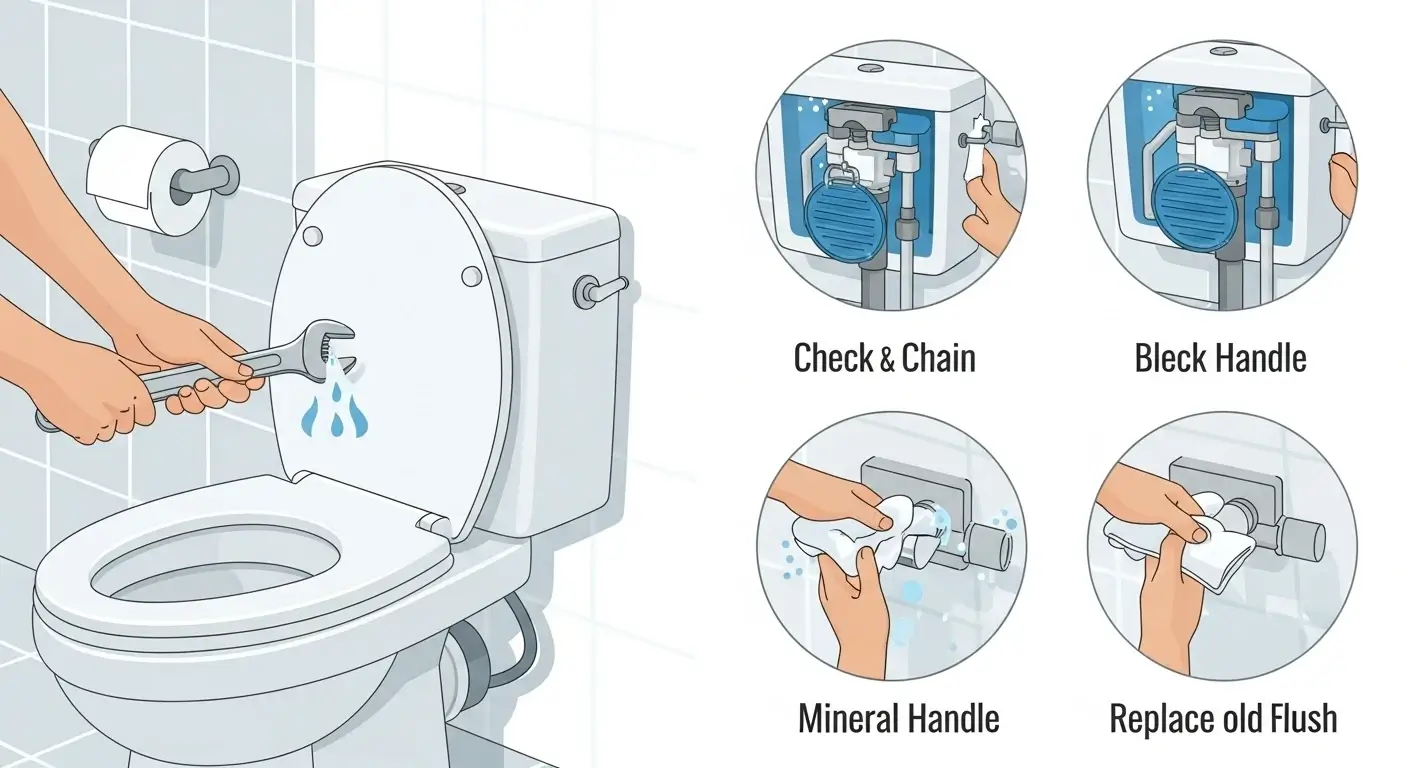
Method 4: Temporarily Fix the Broken Handle or Related Components
Sometimes, the handle issue is a quick fix that restores normal functionality.
- Reattach the Lift Chain: If the lift chain has simply become disconnected from the flush lever, reattach it to the hook on the end of the lever arm.
- Adjust Chain Length: A chain that’s too tight will prevent the flapper from sealing, causing a running toilet. A chain that’s too loose won’t lift the flapper enough for a full flush. Adjust the chain length (usually by moving the hook to a different link) until there’s a small amount of slack when the flapper is seated.
- Lubricate the Lever Pivot: If the flush lever feels stiff or stuck due to rust or mineral buildup, a small amount of plumber’s grease or a silicone-based lubricant can help. Avoid using oil-based lubricants as they can damage rubber components.
- Check Flapper Seating: Ensure the flapper is sitting properly over the drain hole. Sometimes it can shift, preventing a good seal.
When to Call a Professional Plumber
While these DIY fixes are excellent for temporary relief, some problems require professional expertise. You should contact a licensed plumber if:
- DIY Fixes Don’t Work: If none of the manual methods or temporary repairs restore flushing.
- Persistent Running Toilet: This wastes water and can be a sign of a faulty fill valve or a severely damaged flapper that needs replacement.
- Leaks from the Toilet Base or Tank: Indicates a more serious issue with seals, bolts, or the tank itself.
- Clogs You Can’t Clear: If a plunger or small auger doesn’t resolve a clog, there might be a blockage further down the drain line.
- Suspected Internal Damage: If you notice cracks in the toilet bowl or tank, or if components like the fill valve appear significantly damaged.
- Complex Part Replacement: Replacing a fill valve, a full flush valve assembly, or addressing a clogged vent (which can also cause flushing issues) is best left to experienced professionals.
907 Heating & Plumbing Provides Expert Solutions
Our certified plumbers can diagnose the root cause of your toilet issues, from handle repairs to complex internal mechanism replacements, ensuring your plumbing system functions perfectly.
Contact us today for reliable repairs!Preventing Future Toilet Handle and Flushing Problems
A little preventative maintenance can go a long way in avoiding unexpected toilet issues:
- Regularly Check the Chain & Flapper: Once a month, remove the tank lid and inspect the lift chain for corrosion or proper slack. Check the flapper for signs of wear, cracks, or mineral buildup.
- Avoid Slamming the Handle: Gentle use of the flush handle reduces wear and tear on the internal components.
- Clean Mineral Deposits: If you have hard water, consider cleaning the inside of your toilet tank periodically with a vinegar solution to prevent mineral buildup on the flush mechanism and other parts.
- Inspect the Water Supply Line and Shut-off Valve: Ensure these are in good condition and the shut-off valve is easily accessible in case of an emergency.
Final Thoughts
Knowing how to flush a toilet without a handle is a valuable skill for any homeowner, offering quick relief during a plumbing inconvenience. These simple tricks can get you by in a pinch. However, for long-term solutions, underlying issues, or complex repairs, always trust the local experts at 907 Heating & Plumbing for comprehensive toilet repairs and plumbing services. We’re here to keep your home’s plumbing running smoothly.